Winter Window Garden

by Curlydock

Some months back, in November / December of 2006, I wrote several installments dealing with seedling identification. I sprouted seedlings and tried to keep a webcam record of them for future reference. The seedlings became spindly and were growing slowly because, I believe, of short winter days and little light.

I did not want to burn energy in lights and timers, so I left the mini-garden in the southern window to fend for itself. I did keep it watered with rain-water that had been slow-sand filtered. I also warmed the water a bit by storing a gallon or so of it by a furnace duct.

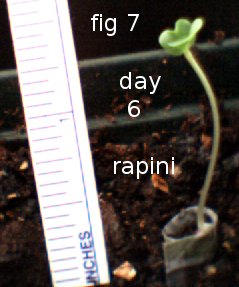
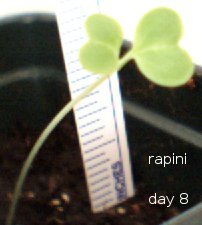
As the days got longer I noticed the plants began to grow more rapidly. A few weeks ago I harvested and ate a head and some leaves from the rapini. It was delicious.

Today, before I harvested and ate the radish I took some webcam shots of the radish and the chard. Someone frequently visits this blog looking for pictures of the plants. So, here are a few more plant pictures.

day 110 white hailstone radish

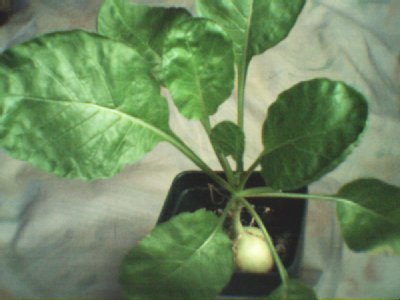
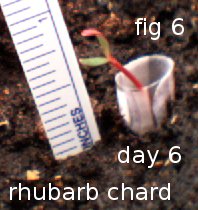
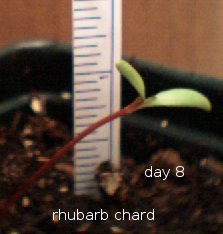
Above is the white hailstone radish. It has been 110 days since the seed was planted. Below is the rhubarb chard. It was planted 82 days ago.

Day 82 rhubarb chard

The pots they grow in are about 3 inches cubed. The potting medium in each is half peat moss and half my vermicompost. Each pot also has about 2 tablespoons of crushed eggshell.

The plants are very delicate. They don’t get strong breezes so their stems have not grown stiff. When I moved the chard to photograph it, it fell over. I propped it up a with a ball of tissue.

When I removed the tissue I noticed the tissue was damp, and the odor I cannot describe except to say it was heavenly.

Drinking in that odor of healthy organic compost in communion with the chard roots reminded me powerfully of what we have lost in our culture. This is the odor of a small organic farm. It is the odor many more of us should be familiar with. It is the odor more of us must become familiar with if there is to be a future for us on this planet.

This odor energizes an intuition of what is right and what is wrong. It puts me out of reach of the propoganda of pundits, thinktanks, preachers, bad teachers, blustering talk show bloviators, and all apologists for greed who seek to influence and control us. It puts my mind and heart on a firm foundation. Let them spin and grin, with their fingers crossed. I know which side I’m on. They won’t fool me again.

Seedling Identification Revisited

by Curlydock

This is the start of my second attempt at seedling identification. This time I have a technique that should remove doubt about what sprouted.

Most of the unwanted volunteers from my previous effort turned out to be tomato seedlings. I fed a lot of tomatoes to the worms, so the seeds were still viable in the vermicompost.

I still want to keep the purported advantages of organic living soil so I still have not sterilized the potting medium. In fact, I am using the same pots I used before. This time, however, the seedling of interst is clearly flagged by a ring of newspaper around the seedling. Any sprout that is outside of that ring can be “weeded out”.

Day 6 Rapini

The ring of newspaper is the top rim of what I call a “tiny pot”. The tiny pots are made from 2-inch squares of newspaper wrapped around the end of a pencil. The small cylinder thus created stays intact when the end of it is crushed closed. The seeds are planted in the open end after the tiny pots are placed into the cells of an ice cube tray and moistened.

Sprouter Tray

To get one and only one seed in each tiny pot, I used a bamboo skewer moistened on the end. Small seeds adhere to the sharp end and larger seeds will adhere to the blunt end. Don’t stick the moist skewer into your packet of seeds. The moisture on the skewer is probably not good there. Sprinkle a few seeds from your main pack into another container and pick the seeds from the other container with the wet skewer. The smallest seeds may be repelled instead of attracted to the skewer at first, but they will soon give up their static charge and stick to it.

sprouter

The particular ice cube tray used was one with a five-by-twelve grid of cells. It makes very small round ice cubes. The tray is kept in a plastic shoe box with a lid to keep the tiny pots moist. I had to use a medicine dropper to remove excess moisture from the tiny pots. You want the tiny pots damp but not soggy. I would not have had to use the medicine dropper if I had drilled a small drainage hole in each of the ice cube tray cells.

Day 6 broccoli

The seeds are carfully selected and metered. Only one seed is planted per tiny pot. However, five seeds of the same type are plated in a row. That allows 12 different types of seed to be sprouted in one ice cube tray. Of the five seeds of one kind in any one row, only the largest or most vigorous sprout is selected to plant in the larger pots cotaining the medium of unsterilised vermicompost. The others are kept for a while in case the first one did not take.

Day 6 Chard

The sprout, tiny pot and all, is moved from the ice cube tray cell and planted into the larger containter of potting medium. Do this as soon as it is obvious the seed has sprouted. Leave enough of the tiny pot visible so it will serve as a flag saying “this is the one you planted”. Pull up anything else that comes along.

Tiny Pot

The tiny pots should decay and return to the soil eventually. The piece of paper they are made from is so small that the decaying paper should not significantly deplete the fertility of the potting medium.

Day 8 Seedlings by Curlydock

It is often difficult to know what is sprouting in the garden. Is it something I planted or a volunteer? I sometimes keep a volunteer, but not always.

broccoli seedling

As a winter project, I decided to germinate some things and keep track of them with a webcam. In future, I can look at the pictures to help me figure out what is in the garden.

broccoli seedling
I currently have 12 different seedlings growing in small pots in a southern window. If this works well, I may extend the project to include other garden plants and “weed” seedlings as well.

chard
These are my first pictures for this particular project. They are of the seedlings mature enough to display discernable details. The others are still too small.

radish seedling

If these pictures are of interst or use to you, please leave a comment to that effect. I am open to suggestions on how to do this better. I have some drawing talent and may someday include drawings of plants.

rapini
If you want to support my work, some of my art and photography is for sale in a gallery I just started.

My gallery is found at http://eulif.imagekind.com/bucolic .

Published in: on November 24, 2006 at 8:40 pm  Comments (30)